
Adventures in creating an NPM library with nrwl/nx
How I learned to stop fighting the Angular configuration gods and embrace the goodness of NX

Moved from Cali to Texas recently. I'm the creator of https://github.com/AgnosticUI/agnosticui where I've tried to build a UI Component library that isn't tied to any one framework (it's currently working for React, Angular, Vue, Svelte, and raw HTML/CSS/JavaScript!) Looking for contributors and users so stop by and get at me!
Context
I'm developing an open source UI component library called AgnosticUI that has the basic value proposition that it's available for React, Angular, Vue, Svelte, and of course basic vanilla HTML/CSS/JavaScript aka "platform web". It's a fun project, and gets me exposure to several FE frameworks I may not deal with at my day gig.
Let the fun begin!
So, this adventure starts in Angular-land, where I have been tinkering to set up the perfect NPM buildable or publishable package for AgnosticUI…
My first stab was just using Angular's ng and setting things up manually. But, then I remembered my work's resident "Angular guru" had used nx, and it had a lot of nice defaults. So, I pretty much backed up my working setup and went on generating my package via nx this time. I should mention that AgnosticUI is a yarn workspaces based monorepo fwiw.
One of the nice things about using nrwl/nx to setup a library, is you can set up your "test app" very easily. In fact, you'll get a directory structure with ./apps and ./libs. So you can have an ./apps/example solely made to test your ./lib/mylib. I find this quite crucial so that I can test my npm package before publishing. The other packages like React, etc., I tend to lean on npm pack which literally tarballs your package just like it'd be if you had npm publish'ed it. Then you can install it locally from your tester app with npm i path/to/tarbal and it will unpack the tarball. Very convenient; but I digress!
So, here's my initial notes on generally setting this up with a little tester exercise that pretty much sums up what I'd done (but don't yet do this yourself…there's a step I missed!)
npm install -g @nrwl/schematics
npx create-nx-workspace --preset=angular
cd nxlib/
npx nx generate @nrwl/angular:lib shared-button
npx nx generate @nrwl/angular:storybook-configuration shared-button
ng g component button --project=shared-button --export
yarn start
Otherwise, it was basically a matter of adding the SharedButtonModule to the application's app.module.ts and then
using the component in the app.component.html:
<main>
  <nxlib-button></nxlib-button>
</main>
Roh-oh! I made a mistake
I got everything working fine until I went to set up the npm publishing functionality itself. I then realized that when I had generated the library I'd left off a very crucial --publishable which literally sets up the build process you'll need to generate your dist!
Unfortunately, there's no real way I found to convert your nx / angular library into a "publishable" one after the fact. Further, there are a lot of little config files and dependencies like the packager and what not that would be tedious to hand set up. I started to but quickly realized I was going down a futile path.
My other option was to simply suck it up and create another library and then copy my working files over. This isn't too bad since you can have as many libs as you want. Oh, the directory structure looks a bit like this:
├── README.md
├── angular.json
├── apps
├── copystyles.js
├── decorate-angular-cli.js
├── dist
├── docs
├── jest.config.js
├── jest.preset.js
├── libs
├── node_modules
├── nx.json
├── package-lock.json
├── package.json
├── tools
├── tsconfig.base.json
└── yarn-error.log
Time to be calm and just move one
So, I humbled myself and reminded myself I should be in "learning mode" and went to work generating another publishable lib (this time), and copying my files over.
nx g @nrwl/angular:lib ag --publishable --importPath agnosticui-angular
And at this point I had the two libraries installed:
The ui was the first try, and ag was the new publishable version. As can be seen, I'd yet to install Storybook:
npx nx generate @nrwl/angular:storybook-configuration ag
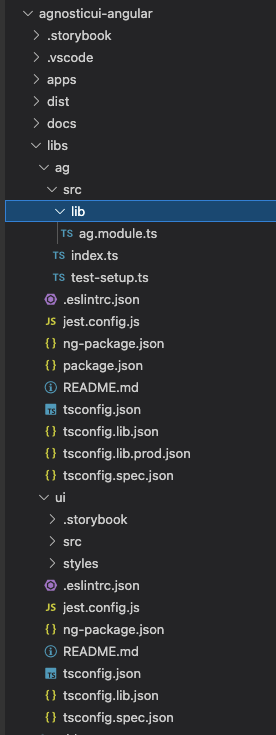
Before testing this new configuration out, I just wanted to copy over a small portion of my already working components. So, I copied over just the buttons:
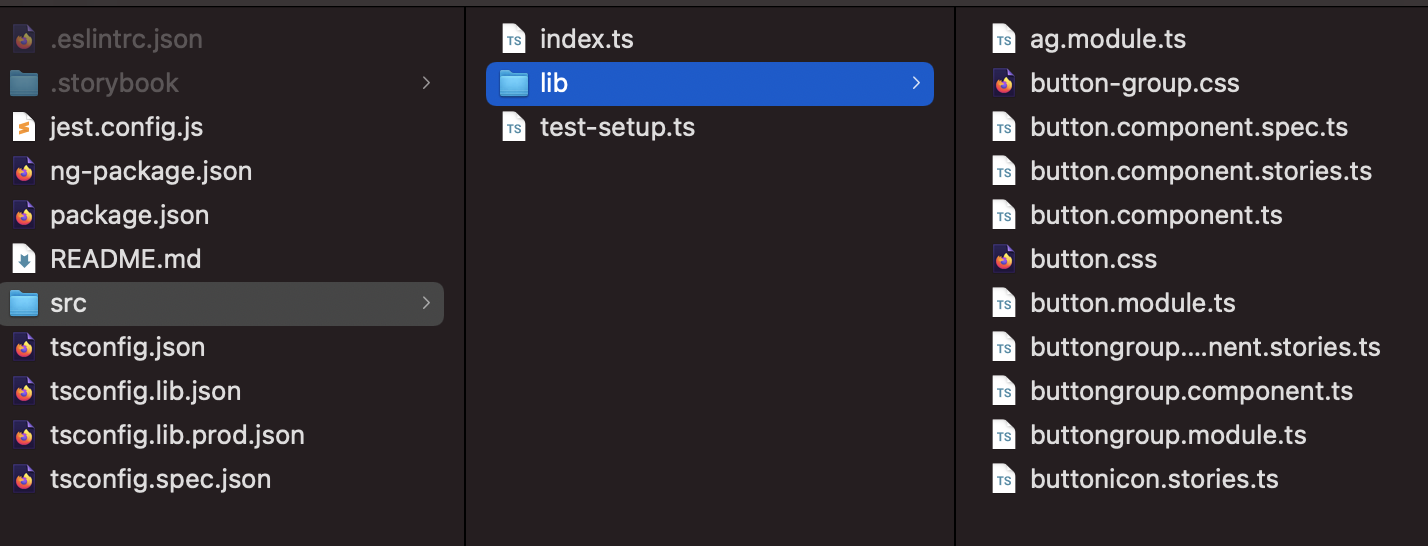
You see the ag.module.ts? That'll get generated for you as <YOURLIB-NAME>.module.ts and basically is that place you'll export your library's module. You also see, one directory above the index.ts—that'll, in turn, pick up those exports and you can export things however you'd like the world to see your package files from an npm package perspective.
So if we now look at a folded version of the angular.json for my new project ag it looks like:
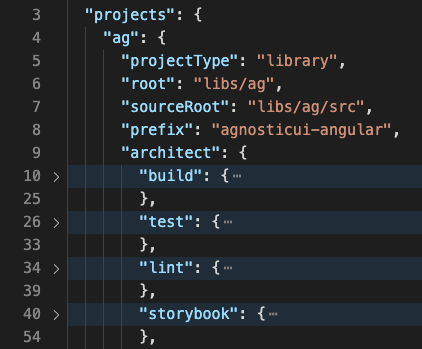
You can mentally map those for your nx run commands like:
nx [project][:target][:configuration]
So, in my case, to run storybook against my new ag project, I want to do nx run ag:storybook (no configuration in this case but that'd be for something like dev or prod if applicable). Obviously, this is worth adding to your package scripts.
Removing the cruft
At this point I elected to remove the previous "un-publishable" ui library. First I used the handy-dandy --dry-run option to see what would happen:
$ yarn nx g @nrwl/workspace:remove ui-e2e --dry-run
yarn run v1.22.10
$ npx nx g @nrwl/workspace:remove ui-e2e --dry-run
UPDATE nx.json
UPDATE angular.json
DELETE apps/ui-e2e/.eslintrc.json
DELETE apps/ui-e2e/cypress.json
DELETE apps/ui-e2e/src/fixtures/example.json
DELETE apps/ui-e2e/src/fixtures
DELETE apps/ui-e2e/src/integration/button.component.spec.ts
DELETE apps/ui-e2e/src/integration/buttongroup.component.spec.ts
DELETE apps/ui-e2e/src/integration
DELETE apps/ui-e2e/src/support/commands.ts
DELETE apps/ui-e2e/src/support/index.ts
DELETE apps/ui-e2e/src/support
DELETE apps/ui-e2e/src
DELETE apps/ui-e2e/tsconfig.json
DELETE apps/ui-e2e
Sounds good to me. I went ahead and removed the ui and it's ui-e2e project. Well, the later had to be removed first since it depended on ui. It was nice to not have a whole extra library in my angular.json and what not.
Summary
Honestly, at this point everything started to "just work"…the individual copying of my button component files ran fine in Storybook, and so I just went on with the tedium of porting those files over and all was fine. But, hopefully, some of these nuances help you to get your component library set up. Don't forget to use --publishable if you're using nx for this :-)
Disclaimer: This is of course very timely info and likely nx et al will change by next week. So, don't expect above commands to literally work verbatim!
Now that I'd used --publishable I had a proper build target provided by the nx generator. Using the same run syntax discussed above, I added this to my package.json:
"build:ag": "yarn syncStyles && nx run ag:build",
Again, ag is the project name, and build is the target. Ignore the syncStyles; that's my own custom thing. Here's what happened when I ran:
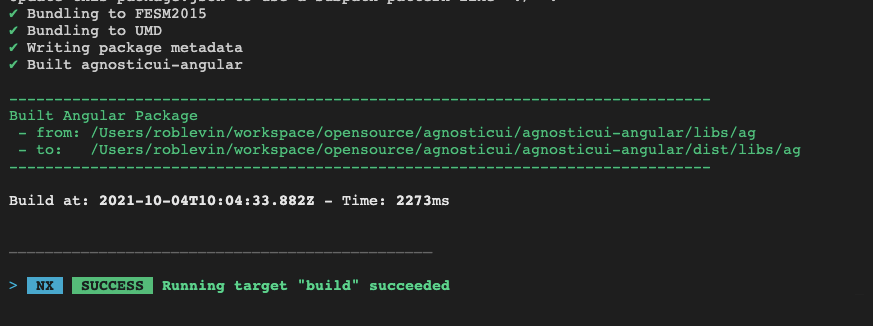
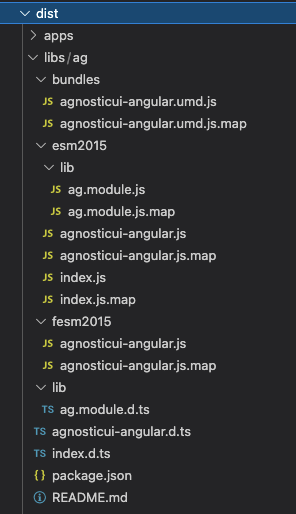
I was quite pleased to not have to hand configure UMD, esm, and friends! I haven't yet tested this out as I'm still in the thick of the battle, but it's looking promising!
If you'd like to see how I'm using this I'd encourage you to check out AgnosticUI—Angular. It's very early and a work-in-progress, but may prove valuable in seeing how things evolve. If you clone the repo try yarn && yarn start:angular to fire up an angular storybook. Everything else is pretty much package.json scripts driven so you shouldn't have any issues ramping up.
Thanks for stopping by!

